Learning Objectives
By completing this lesson,you will be able to:
-
Understand the basic steps for creating a new application and worksheet.
-
Configure commonly used field such as Text, Number, and Date, and choose the correct type of different fields.
-
Perform essential data operations such as add, edit, search, filter, sort, delete, and restore.
-
Create records by importing data from Excel.
Scenario Case
MEGA Technologies Co., Ltd. is a fast-growing startup focused on smart hardware and cloud services. As multiple business units are being launched, the company is actively hiring for various roles, including R&D engineers, marketing specialists, and operations assistants.
To improve the HR department's efficiency and standardize the process of employee information collection and management, the HR team has decided to build an Employee Management Application to record all employees’ basic profiles.
Now, your goal is to help MEGA create an application that meets the following requirements:
-
Build a comprehensive Employee Directory that includes all employees who are onboarding, currently employed, or already departed.
-
Record basic information such as: Name、Gender、Employment status、Entry date 、Date of birth、Age、Contact number、Personal email、Photo
-
The HR team already has an Excel-based roster. You’ll need to import this data in bulk into the application
Preparation
Just in case you forget, we need to remind you again to download the Excel file provided for this lesson — it will be used for importing employee records.
Step-by-Step Guide
Create the Employee Management Application
Although we’ve already installed a sample application for you in a previous lesson, here’s how you would normally create a new application from scratch:
-
After logging in to the platform, navigate to the Applications section from the left-hand sidebar.
-
Click Create Application – From Scratch, and set up a circular icon, which will represent your new application.
-
After creating the application, click the three dots in the upper-right corner of the application icon to edit the application name, icon, color, and more. Rename the application to “Employee Management” and click anywhere on the page to save the settings.
Employee Directory Worksheet
-
Click the “Employee Management” application icon to enter the application. A newly created application is like an empty container — nothing is inside yet, so we need to add more modules. First, we need to create the Employee Directory worksheet. Click From Scratch to add a new worksheet and name it “Employee Directory.”
Add Field
-
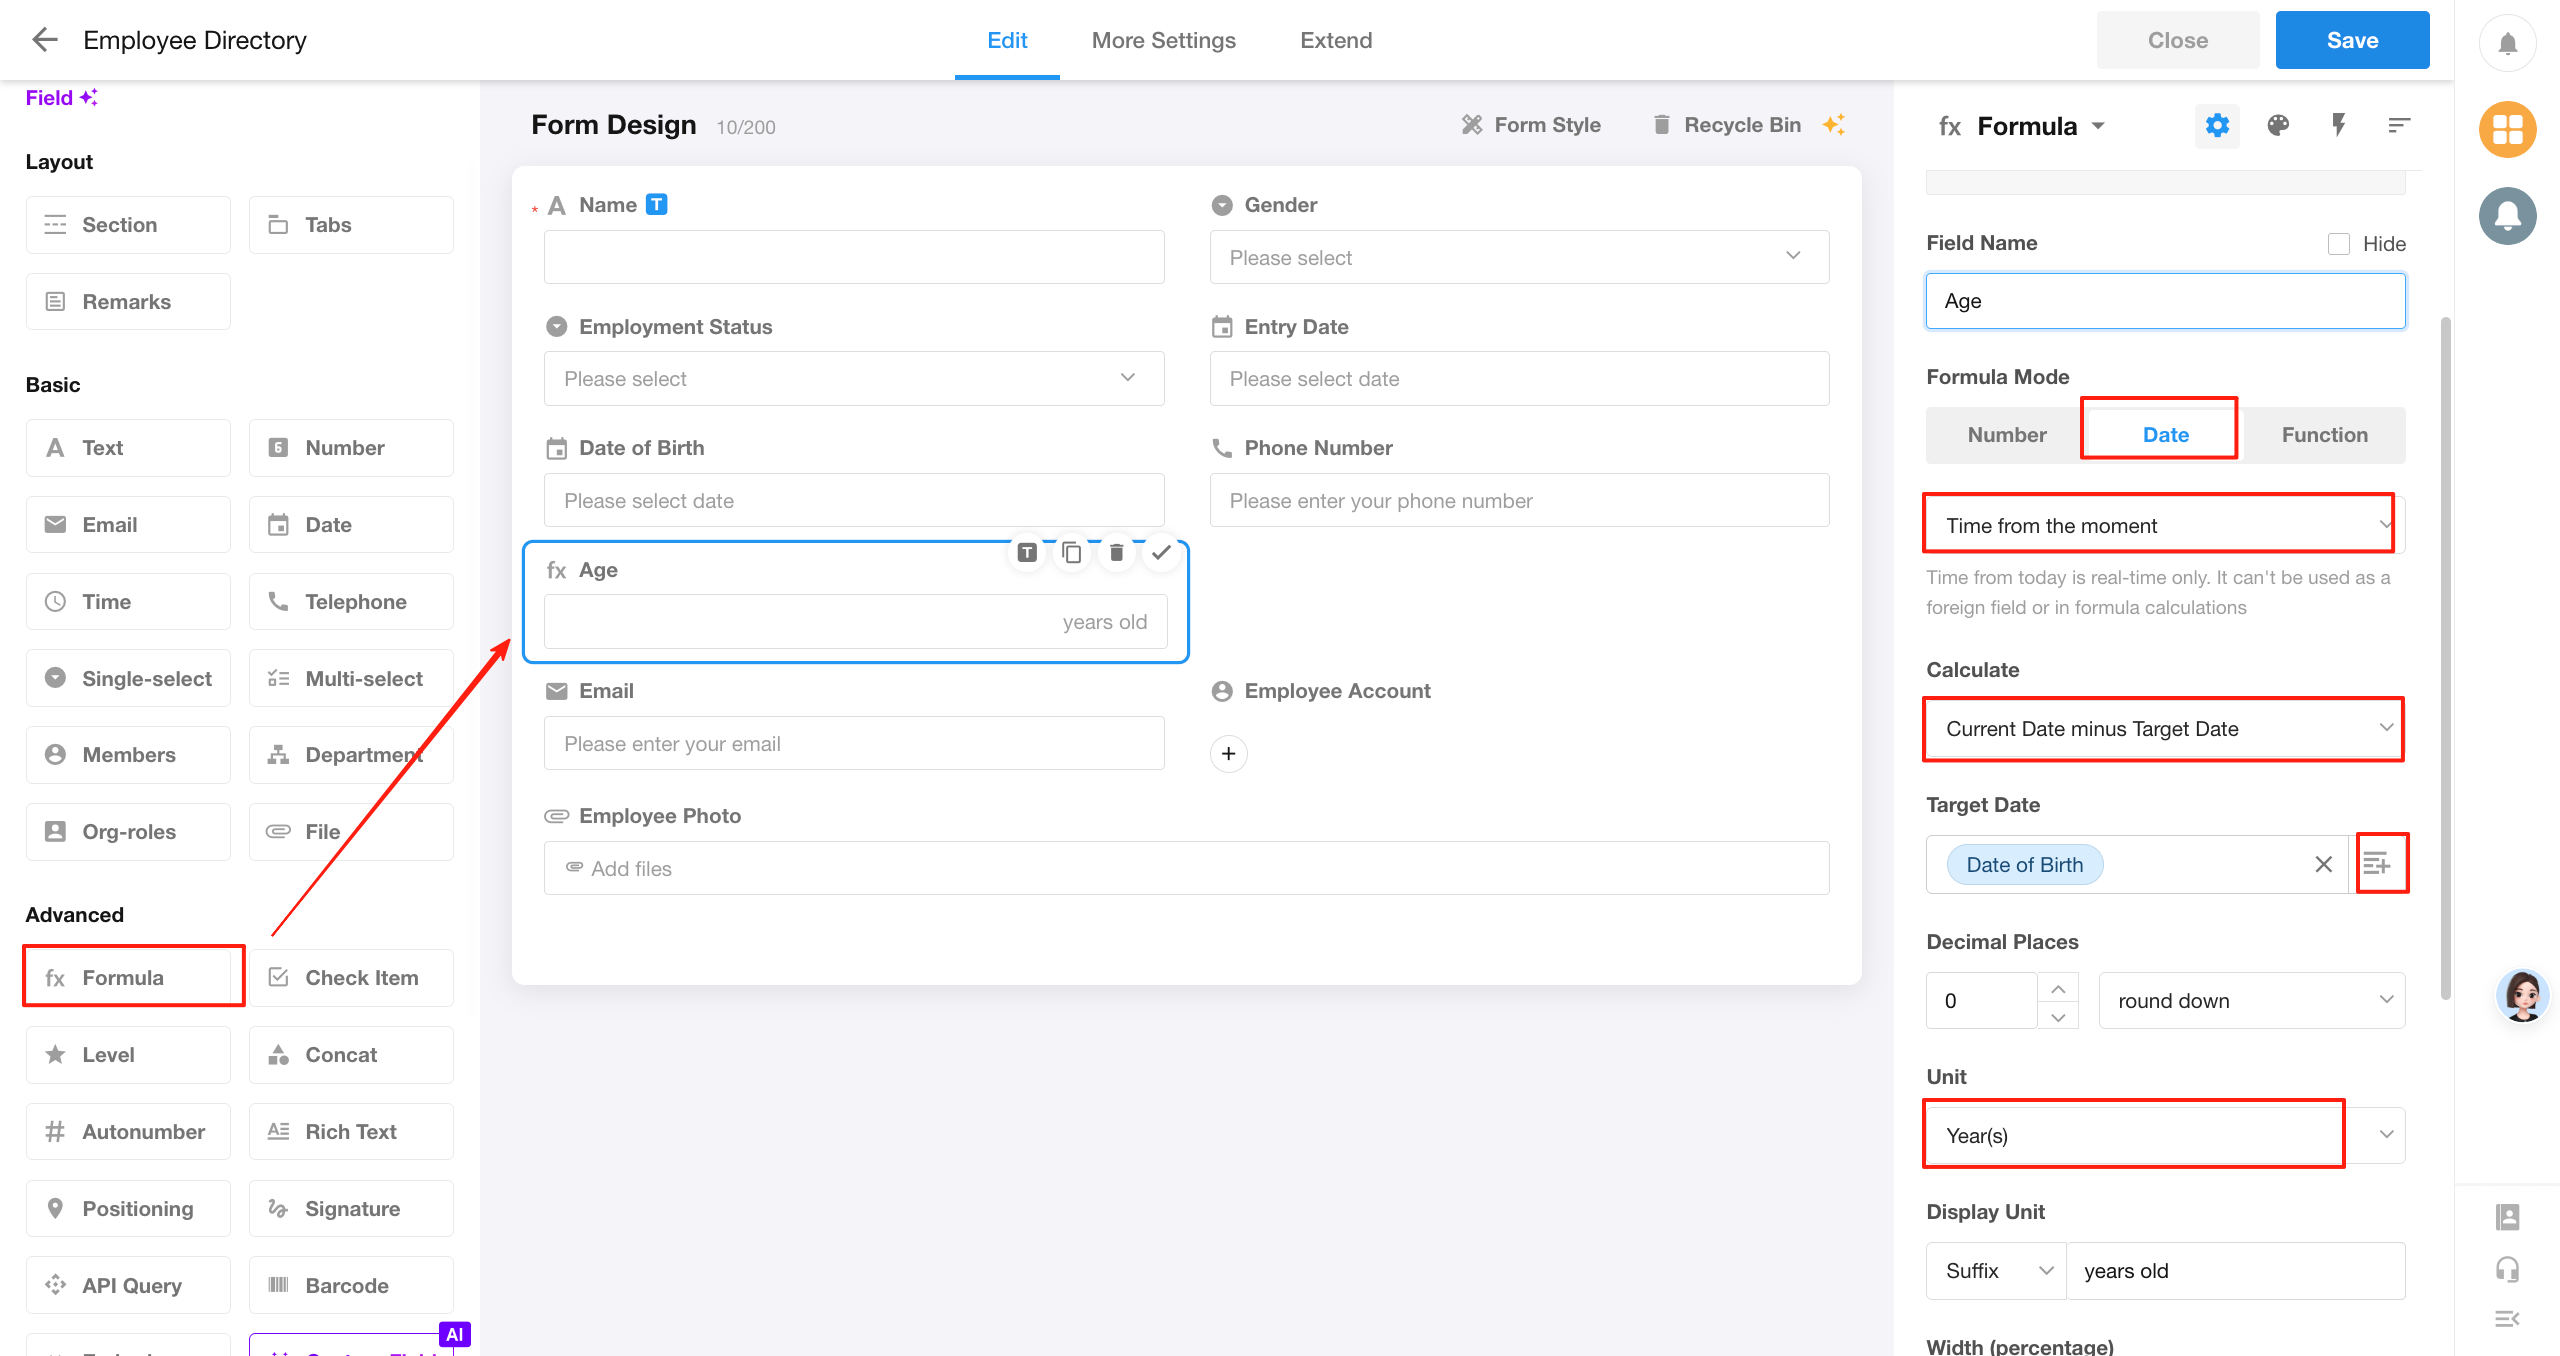
After creating the Employee Directory worksheet, you will enter the form design page. The page is divided into three sections: the left sidebar contains various types of field controls, the central canvas displays the current fields of the form, and the right sidebar shows detailed configuration options.
Employees have many attributes, such as name, gender, and date of birth — these attributes correspond to fields in the worksheet.
To add more attributes for employees, you can drag the appropriate field controls from the left sidebar onto the central canvas. It’s important to choose the correct field type for each attribute. For example, Entry date should use a Date field, and Gender should use a Single Select field.
-
When a field is selected, you can delete it, duplicate it, or set it as the title. On the right side of the page, you can further configure the field — such as setting the field name, making it required, setting a default value, and more.
-
In the Employee Directory worksheet, add the following fields:
|
Field Name
|
Type
|
Description
|
|
Name
|
Text
|
|
|
Gender
|
Single Select
|
Male, Female
|
|
Employment Status
|
Single Select
|
Onboarding, Probation, Regular, Departed
|
|
Entry date
|
Date
|
YYYY-MM-DD
|
|
Date of Birth
|
Date
|
YYYY-MM-DD
|
|
Age
|
Formula
|
= Number of years between date of birth and today
|
|
Phone Number
|
Phone
|
|
|
Email
|
Email
|
|
|
Employee Account
|
Members
|
|
|
Employee Photo
|
Attachment
|
|
One special case is the Age field. If we want an employee's age to update automatically over time (e.g., Tom was 28 last year and should turn 29 after his birthday this year), we can add a Formula field named Age. This field will automatically calculate the number of years between the Date of Birth and the current date — that number represents the employee's age.
-
After configuring all the fields, click Save in the upper-right corner. Once saved successfully, click Close.
-
After closing the form design page, if you want to reopen it, simply click the “···” button on the worksheet and select Edit Form to return to the form design page.
Set a Meaningful Title Field
When setting the title field of a form, it’s important to choose carefully. In many areas of the application — such as related record selection and workflow execution history — only the title field is displayed by default.
An ideal title field should meet the following two criteria:
-
Clear identification — Users should be able to quickly recognize the subject of the record from its title.
-
Minimized duplication — Titles should be unique or varied enough to make filtering and searching easier.
Therefore, in the Employee Directory worksheet, the Name field should be set as the title field.
Data Entry
Manual Creation
-
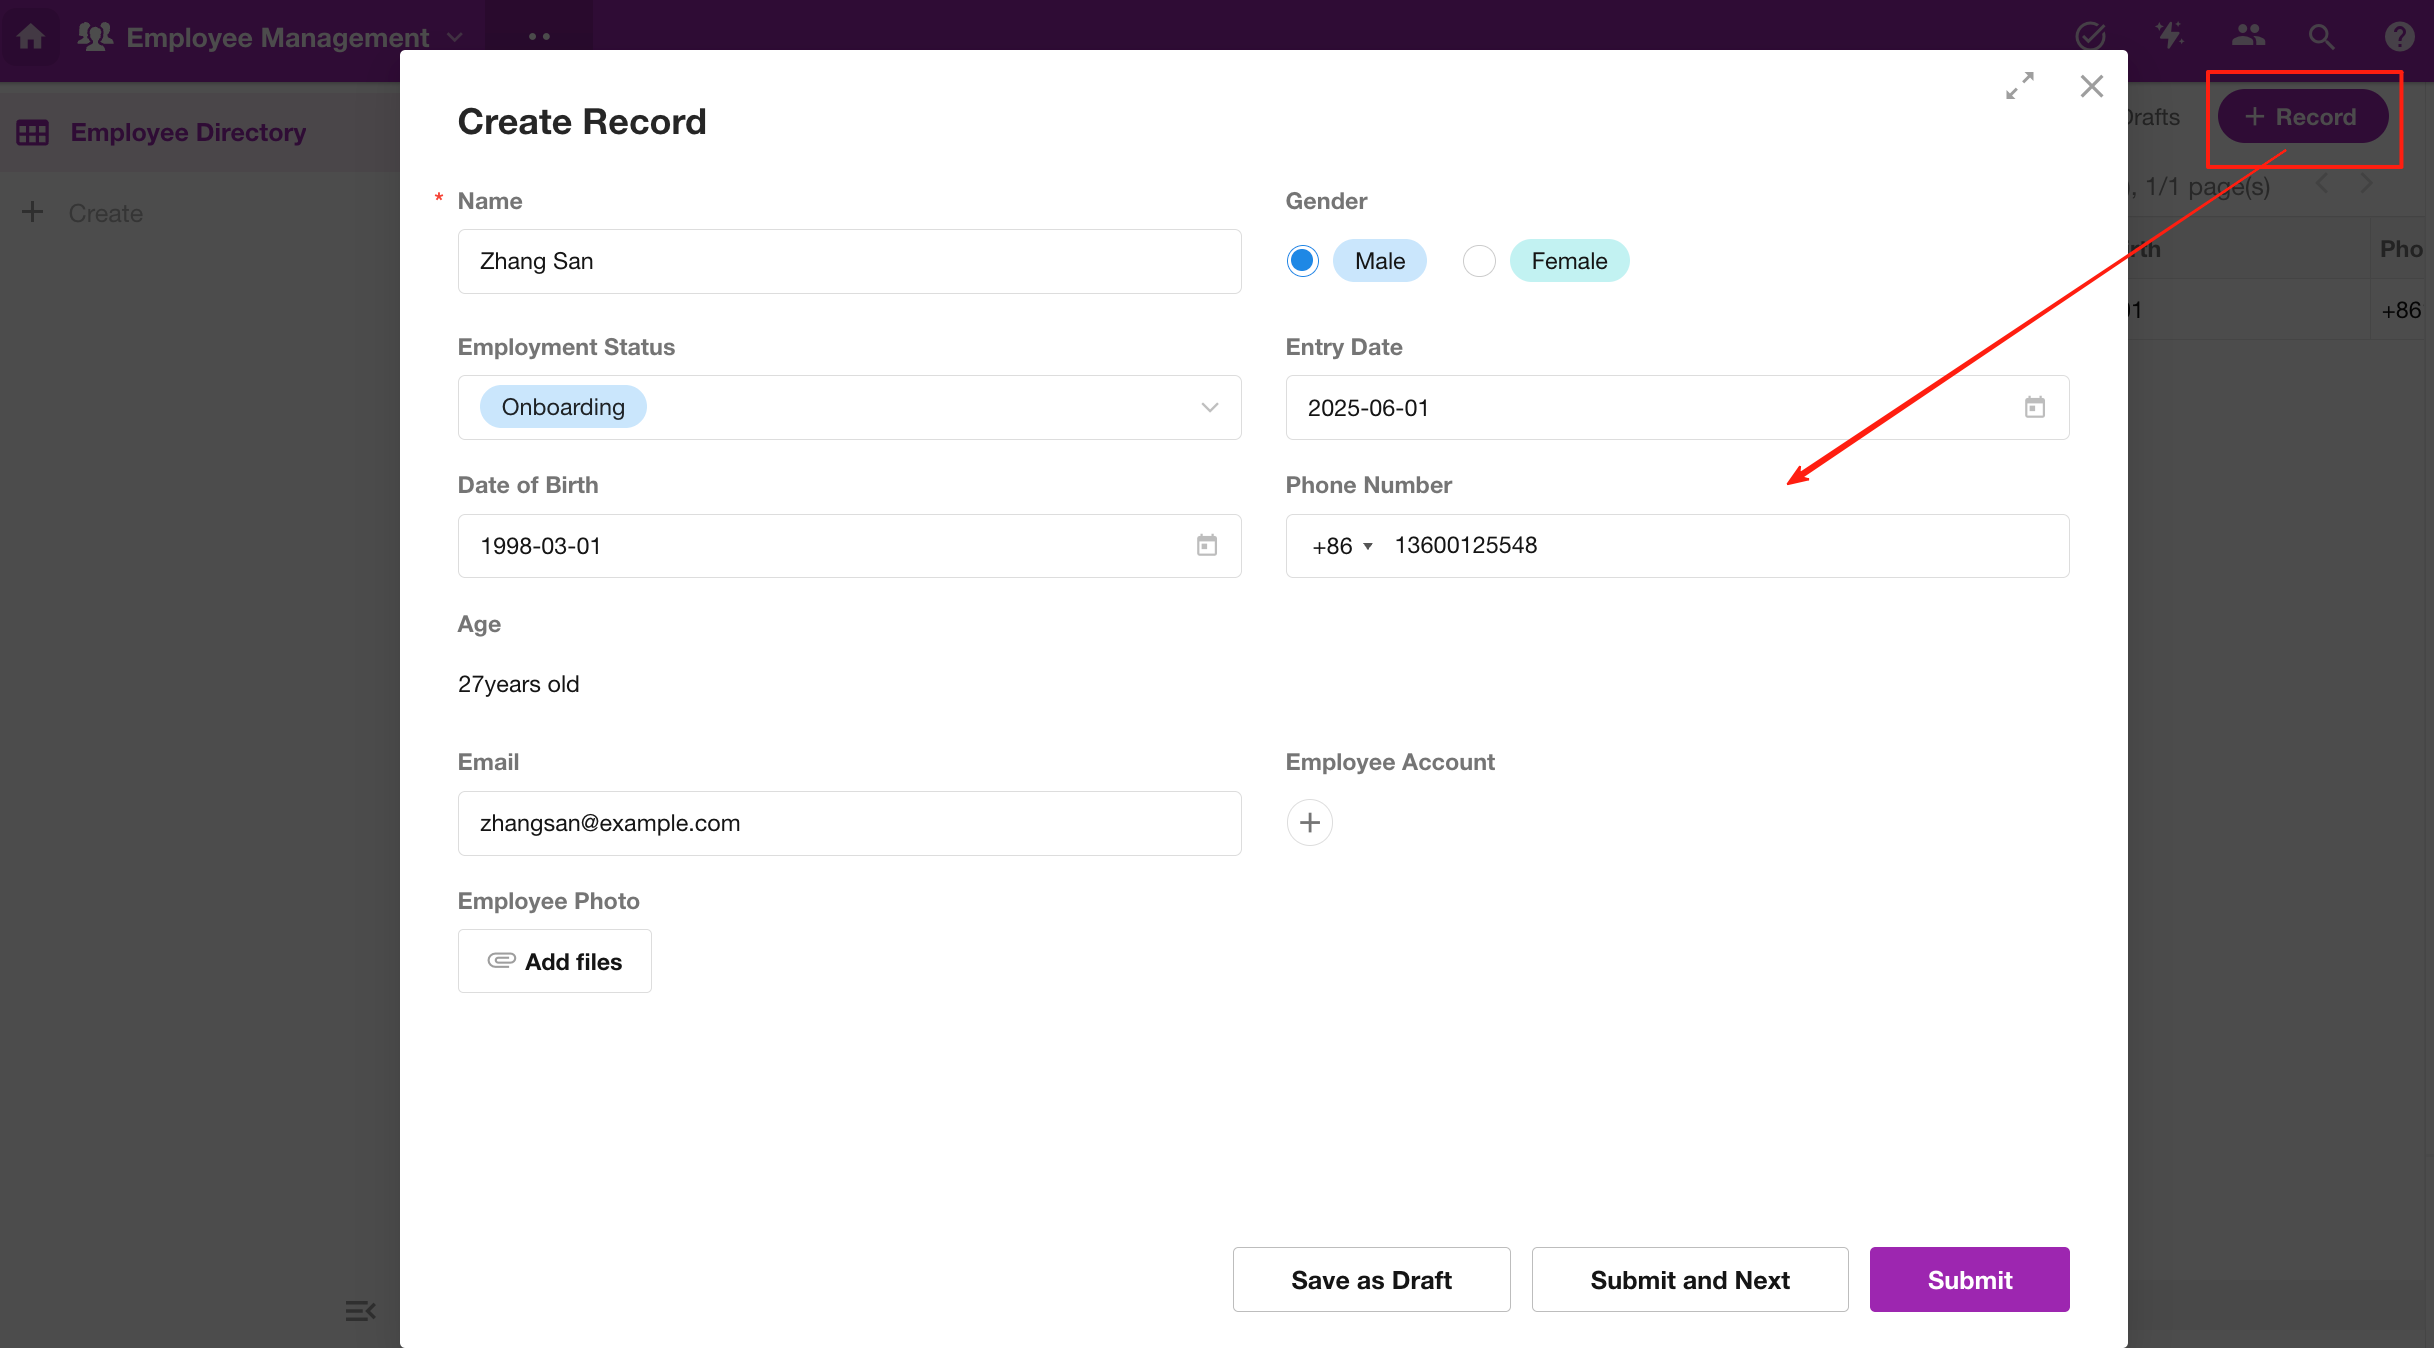
Click the + Record button in the upper-right corner to manually add a new entry.
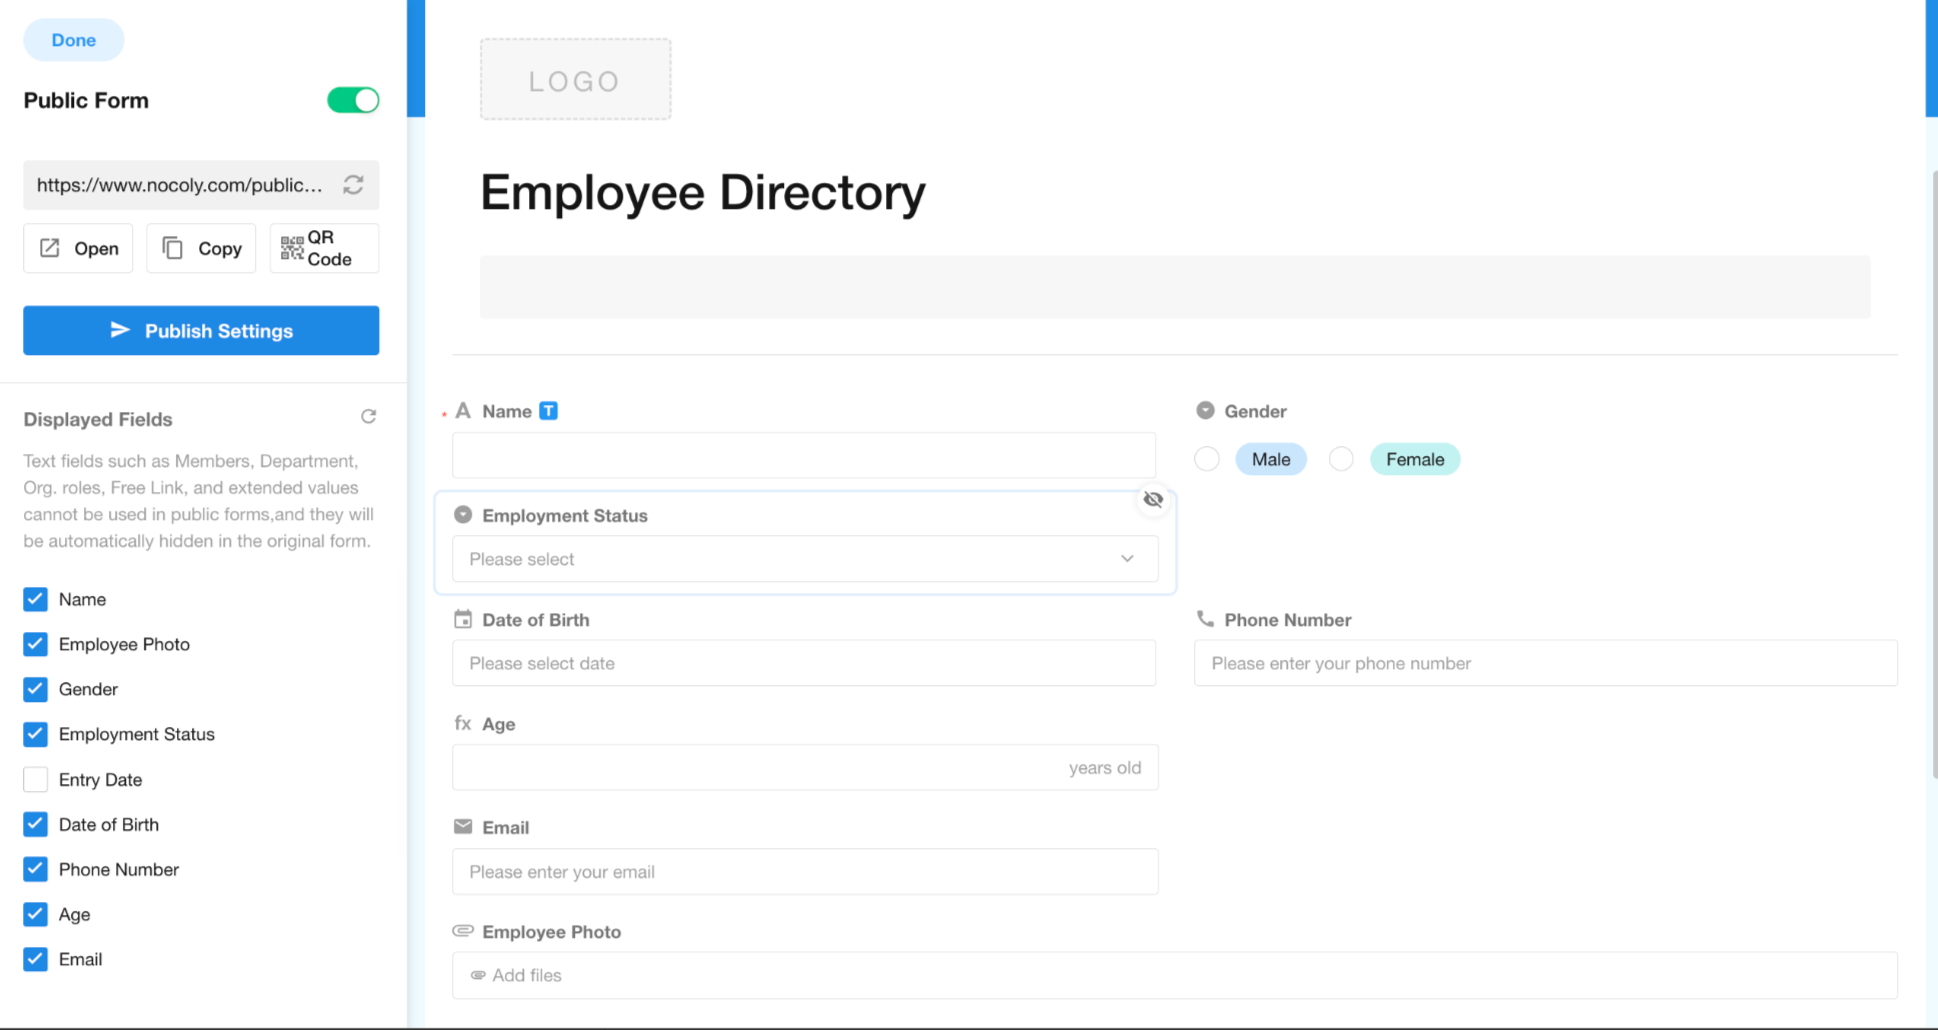
Public Form
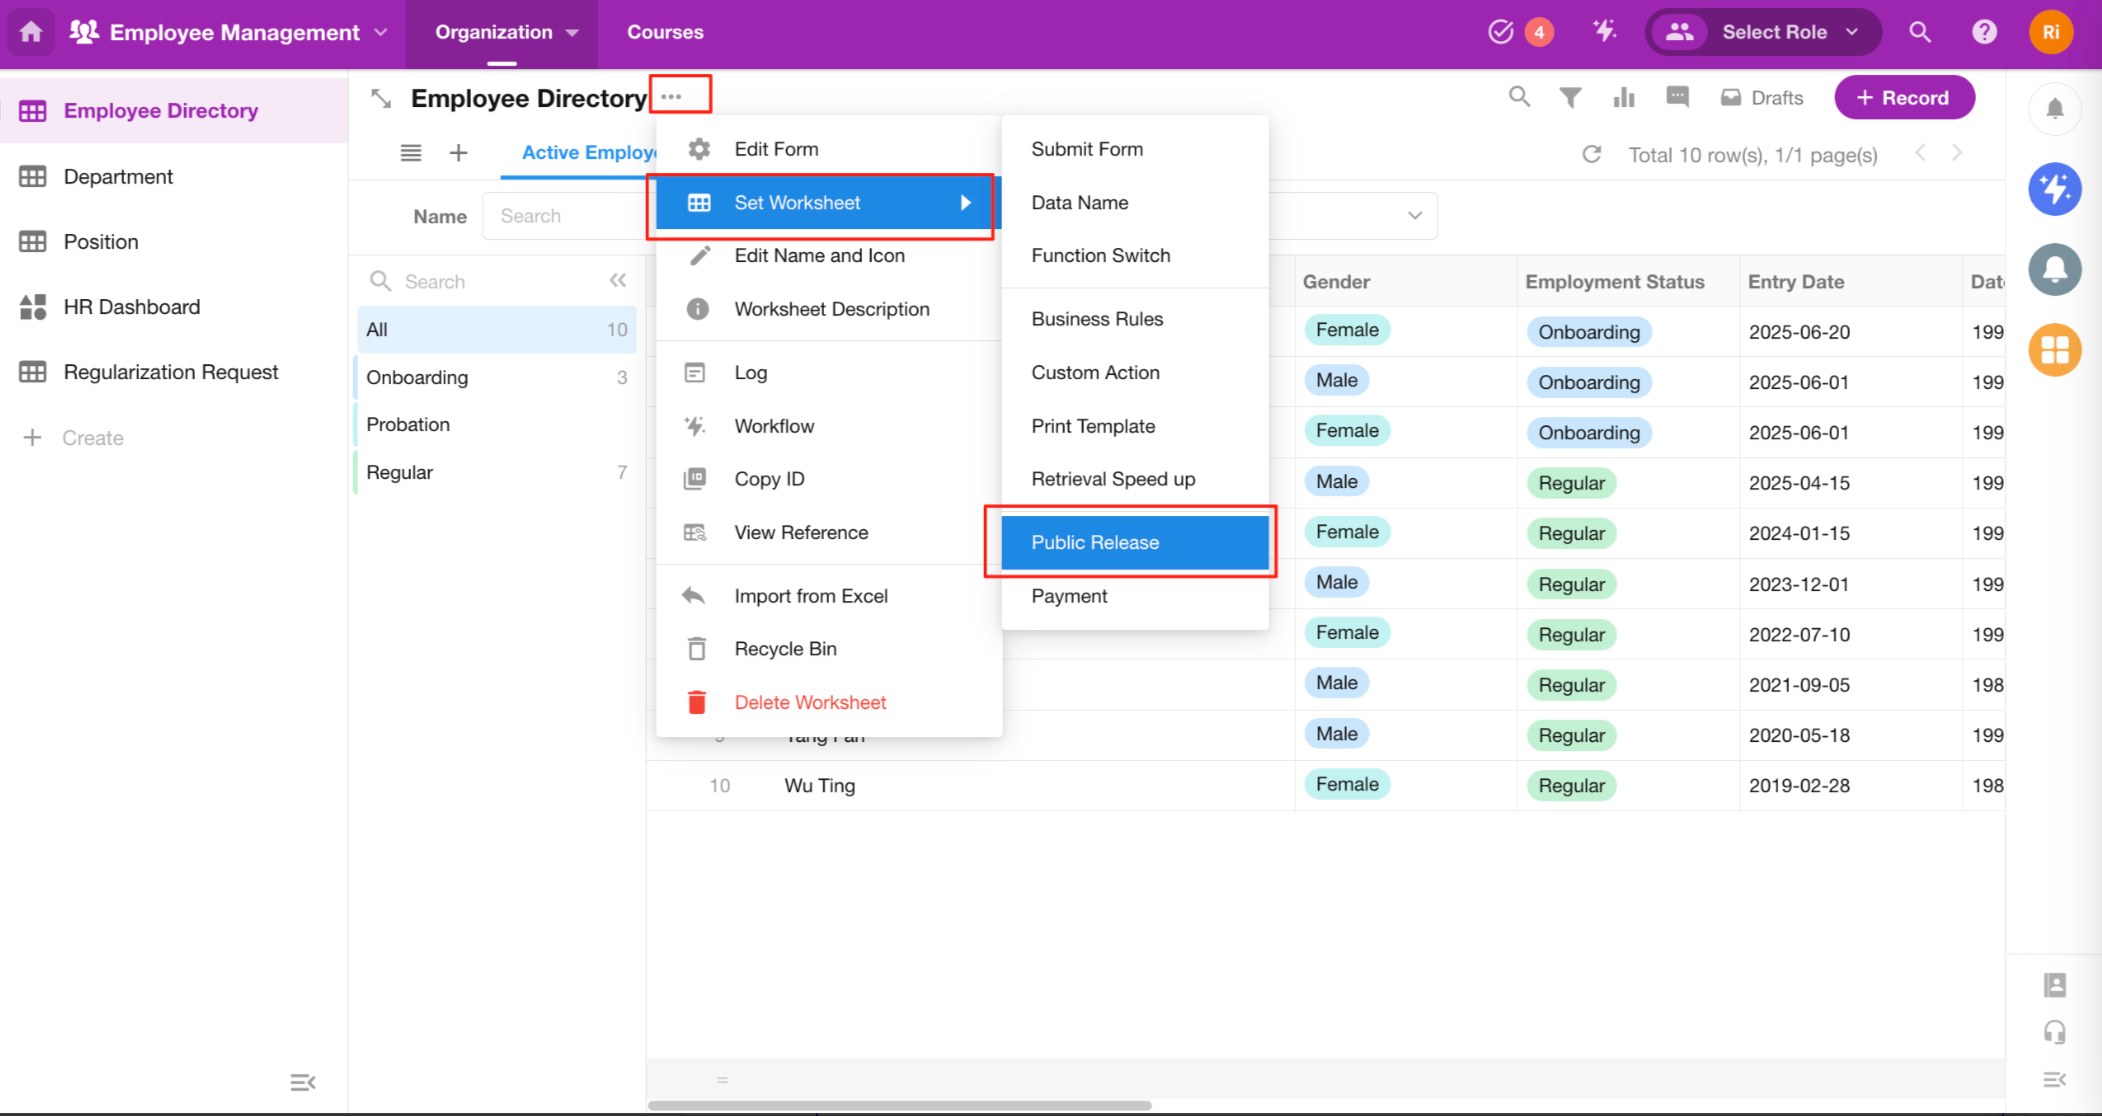
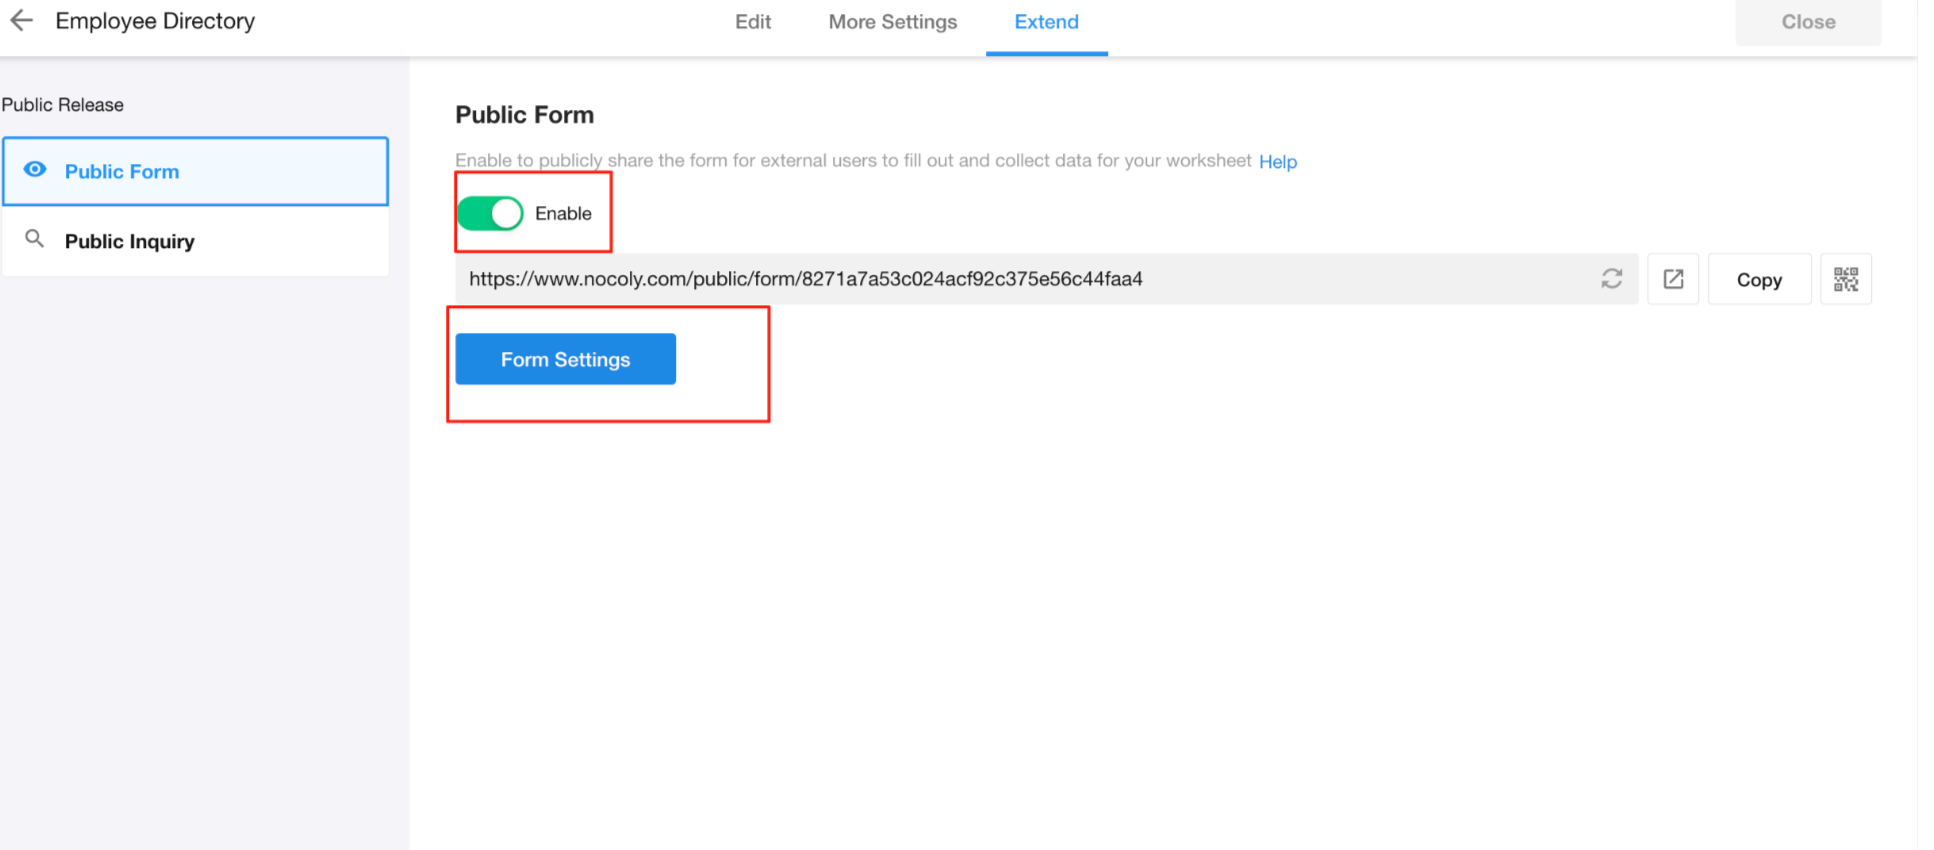
Through the Public Release - Public Form , we can publish the prepared worksheet in the form of a public questionnaire. In this way, anyone can enter data into the worksheet without logging in with an account.
For more configurations of the public form, see
Import Data from Excel
-
As mentioned in the Preparation part, you should have already downloaded the required Excel file. If you haven’t done so yet, please go back to that part and complete the download.
-
When you open the Excel file, you’ll see a list of employee records. Next, we’ll import this batch of employees into the Employee Directory worksheet we just created.
-
Go back to the application, click the “···” icon on the worksheet, and select Import from Excel.
-
Follow the instructions to upload the Excel file, select the data to import, map Excel columns to worksheet fields, and click Start Import. Once the system confirms a successful import, refresh the view to see the newly added employee records.
Basic Operations
Search
You can search for employee information using the search bar in the upper-right corner of the form.
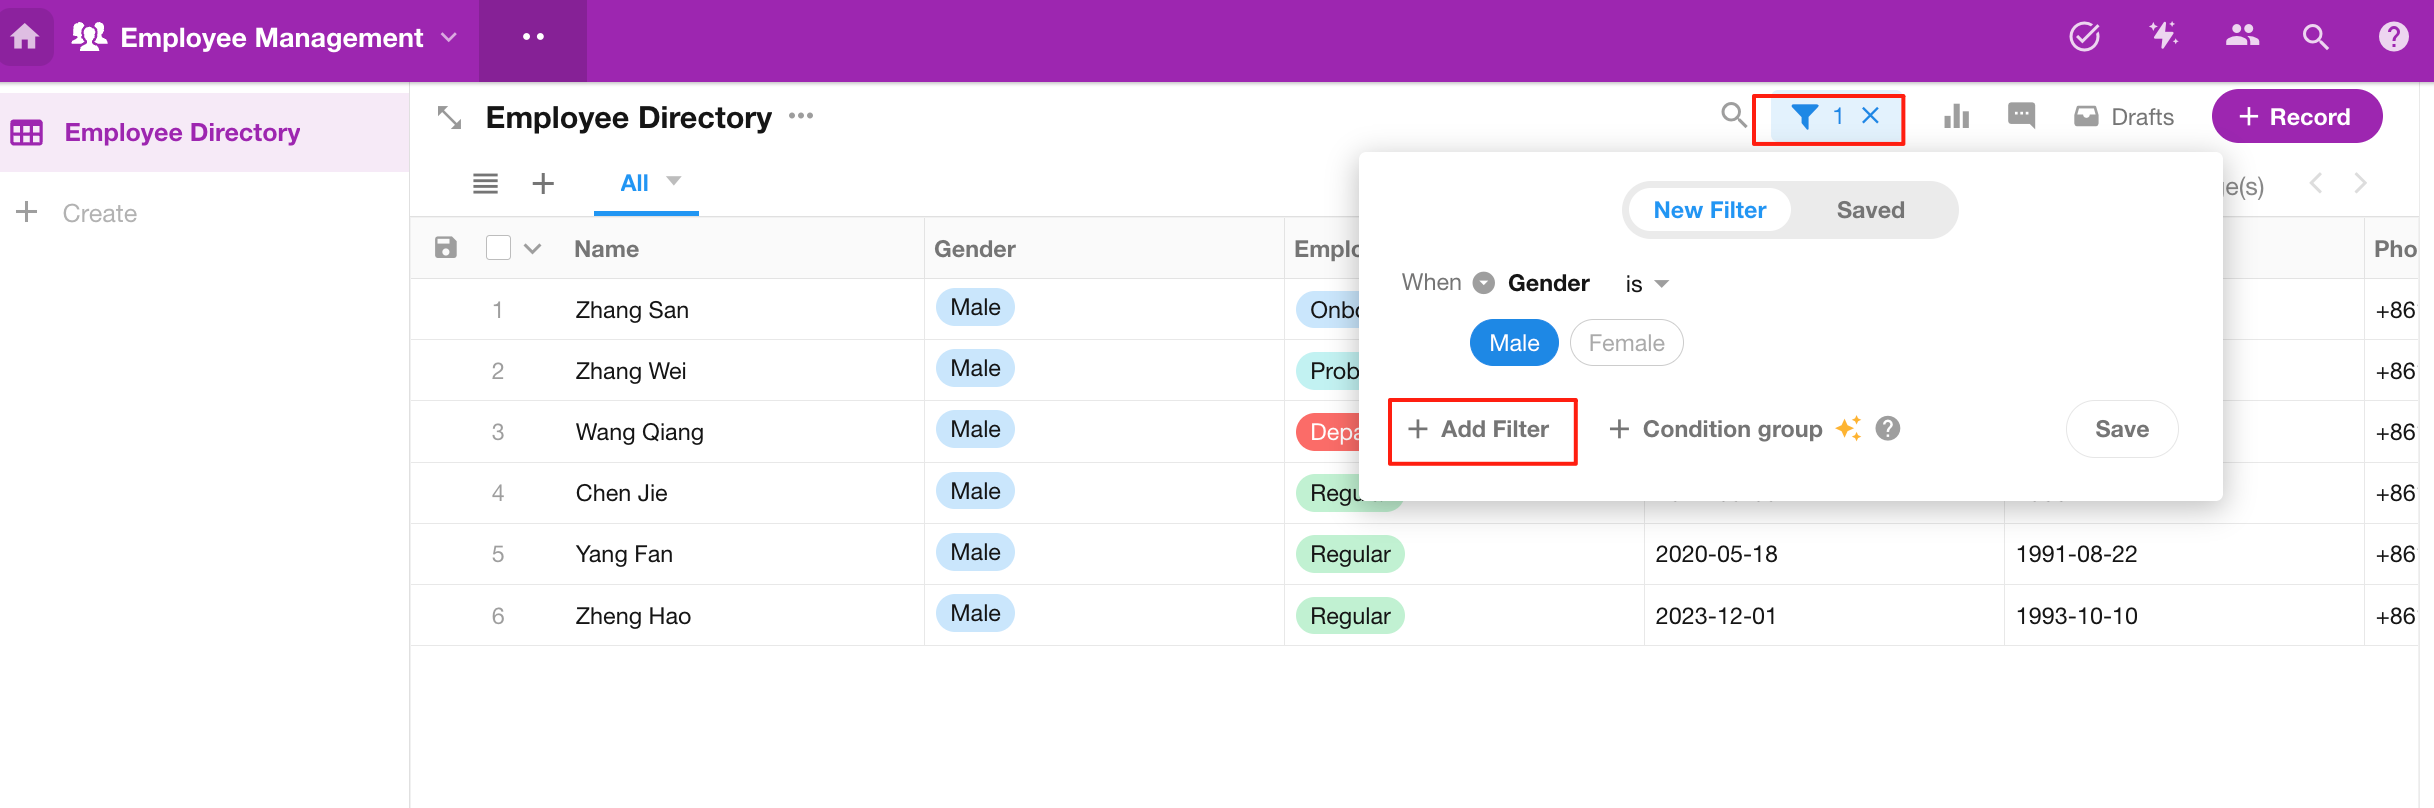
Filter
You can use the filter to narrow down data based on specific form fields.
Sort
Click on a column header to sort the data based on that field.
Delete / Restore Records
Sometimes you may need to delete unnecessary data. You can select the records and delete them. Within 60 days, deleted records can be recovered from the Recycle Bin.
For detailed instructions on deleting records, refer to:
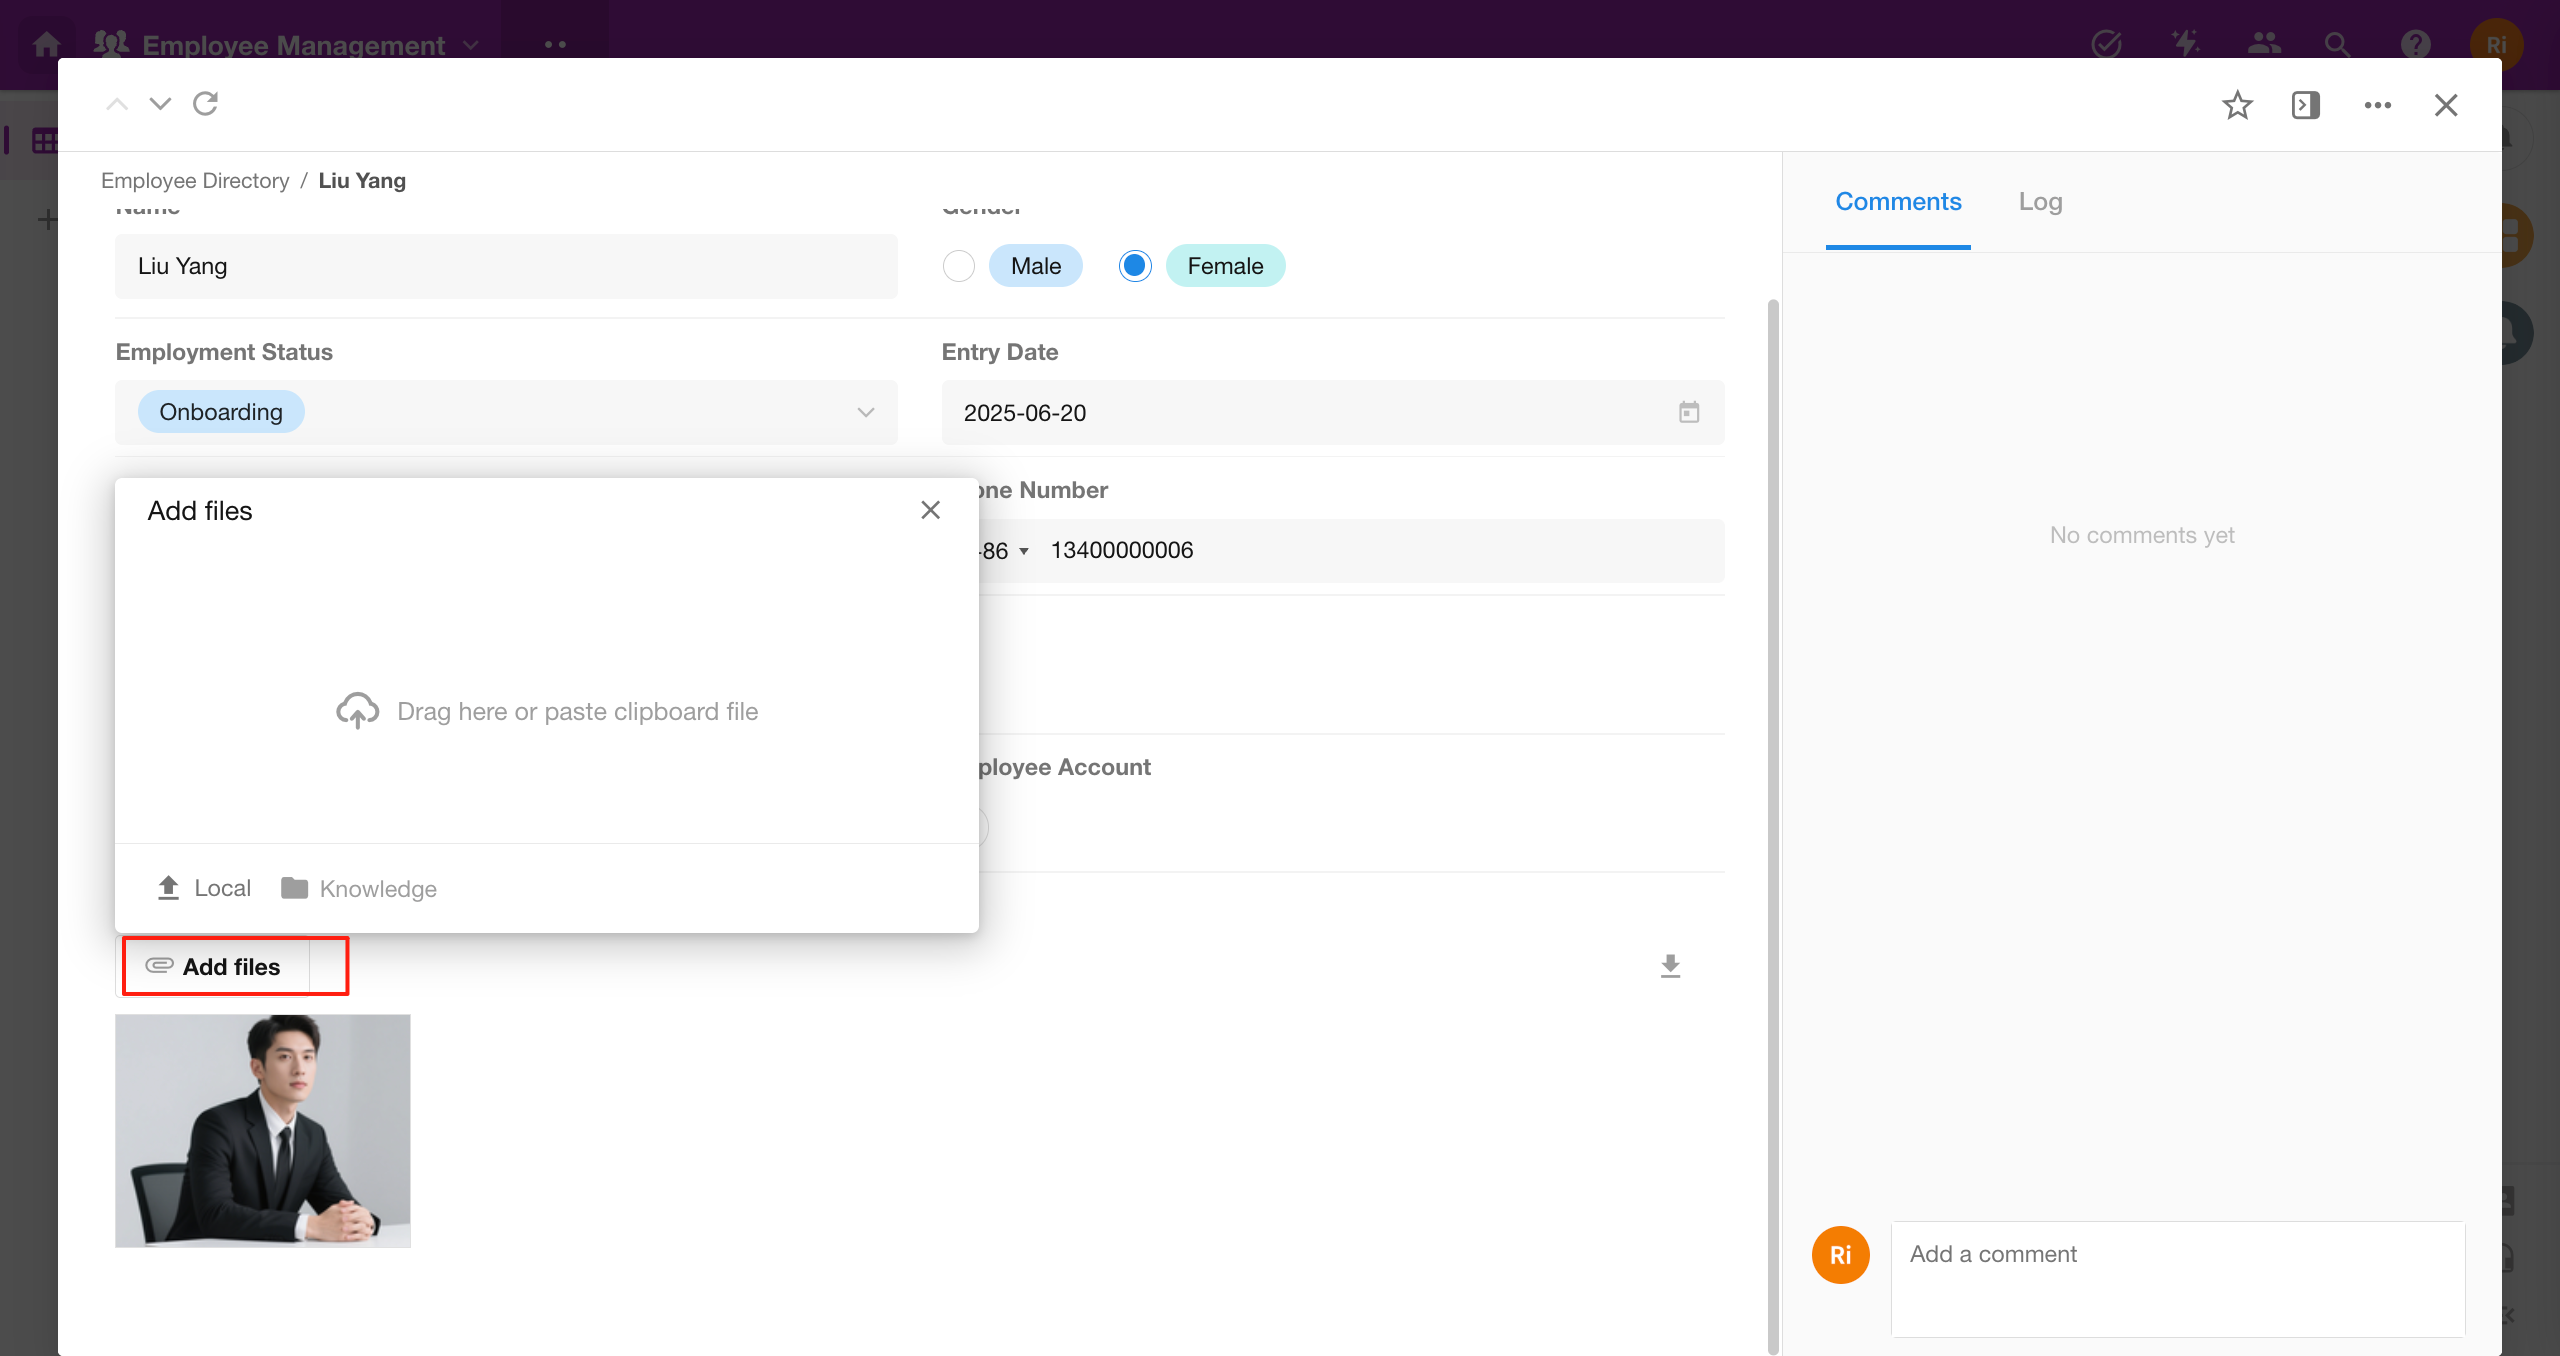
Edit
You can edit existing employee profile information either in the list view or by opening the record in the detail page. For example, you can update the employee’s Entry date or add a profile photo.
Hands-On Practice
Now, click the "Open the Practice App" button in the upper right corner of the page to access the hands-on application designed for this course, and start practicing!